

A puddle of water pooling at the bottom of your fridge is never a fun surprise. That mysterious moisture, along with strange odors and the occasional layer of ice, usually points to one common culprit. Your refrigerator’s drain line is blocked. Learning how to unclog refrigerator drain issues is one of the most useful skills you can pick up as a homeowner, and the good news is that you don’t need to be an appliance expert to get it done.
This guide walks you through the whole process in plain language, step by step, so anyone can follow along with confidence. You’ll discover why clogs happen, what tools you need, and how to clear the blockage safely without damaging your appliance. We’ll keep things simple, practical, and easy to repeat next time. By the end, you’ll feel empowered to tackle the job yourself, save money on repair calls, and keep your fridge running fresh and dry all year long.
Why Unclogging Your Refrigerator Drain Matters
A clogged drain does more than leave water on your kitchen floor. When the drain line backs up, moisture collects inside the fridge, creating the perfect home for mold, mildew, and bacteria. That leads to unpleasant smells and can even affect the food you store. Left alone, standing water can freeze and force your appliance to work harder, which raises energy bills and shortens its lifespan.
Clearing the drain restores proper airflow and drainage, keeps temperatures stable, and protects your food from spoilage. It’s a small maintenance task that delivers big rewards. A few minutes of care now saves you from costly repairs, wasted groceries, and messy cleanups later. Think of it as a quick tune-up that keeps everything running smoothly.
Step-by-Step Guide to How To Unclog Refrigerator Drain
Step 1: Unplug and Empty the Fridge
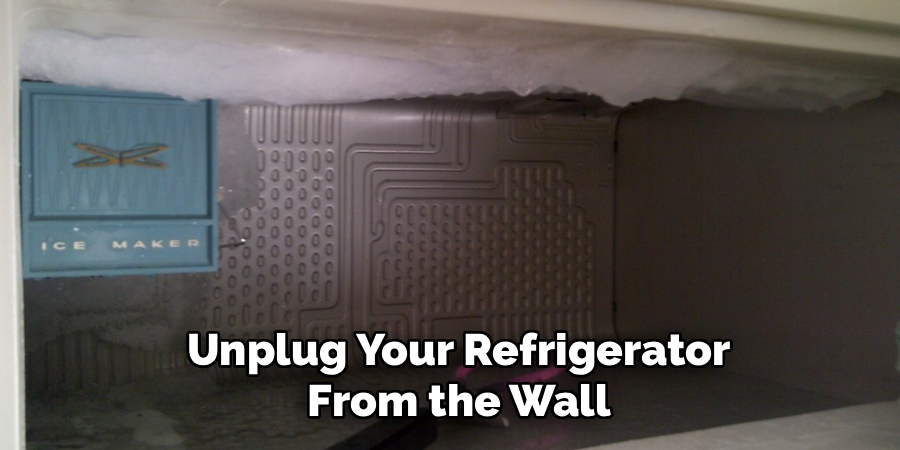
Before you touch anything, safety comes first. Unplug your refrigerator from the wall outlet to avoid any electrical risk while you work. Next, remove the food from the bottom shelves and freezer so you have clear access to the interior. Set perishable items in a cooler with ice packs to keep them fresh during the process.
Take out the lower drawers and shelves as well, since the drain opening usually sits behind them. Giving yourself room to move makes the whole job easier and far less frustrating. A little prep now saves a lot of hassle later on.
Step 2: Locate the Drain Hole
Once the interior is clear, find the drain opening. In most fridges, it sits at the back wall of the fresh food compartment, near the bottom, often as a small hole or a shallow channel that funnels water downward. In freezers, it’s usually hidden beneath the rear panel after you remove any built-up ice.
Grab a flashlight to spot it clearly, and look for signs of frost, food debris, or slime around the edges. Knowing exactly where the blockage lives helps you aim your cleaning tools with precision. Take a moment here so you don’t waste effort in the wrong spot.
Step 3: Thaw Any Ice Buildup
Blockages are often caused by frozen water trapped inside the drain line. If you spot ice around the opening, you’ll need to melt it before anything else will flow. The simplest fix is to leave the fridge unplugged and let it defrost naturally for a few hours with the doors open.
If you’re short on time, pour warm water gently over the frozen area, or use a hairdryer on a low setting held at a safe distance. Never use sharp metal objects to chip at the ice, since they can puncture the drain and create a much bigger repair. Patience pays off here.
Step 4: Flush the Drain With Warm Water
Now that the ice is gone, it’s time to clear out the gunk. Mix a solution of warm water with a small amount of baking soda, which naturally deodorizes and breaks down grime. Draw the mixture into a turkey baster or a small squeeze bottle for controlled pressure.
Insert the tip into the drain hole and push the warm solution through in steady bursts. You should feel and hear the water moving down the line. Repeat this a few times until the liquid flows freely without backing up. This flush loosens soft debris and starts to restore healthy drainage inside your appliance.
Step 5: Clear Stubborn Blockages Manually
Sometimes warm water alone won’t shift a tough clog, and that’s where a bit of gentle manual work comes in. This is the heart of how to unclog refrigerator drain problems that resist flushing. Take a length of flexible pipe cleaner, a small plumbing snake, or a thin piece of coated wire and feed it carefully into the drain opening.
Push it in slowly with a light twisting motion to catch and break apart the debris. Avoid forcing it, since too much pressure can damage the line. Once you feel the obstruction give way, pull the tool out along with the loosened gunk, then flush again to confirm the path is clear.
Step 6: Clean the Drain Pan
Water from the drain doesn’t just vanish. It travels down to a drain pan located underneath the fridge, near the compressor. Over time, this pan collects dirty water, dust, and food particles that produce odors and can even overflow. Pull your refrigerator away from the wall and locate the pan at the base.
Slide it out carefully if your model allows, then empty and wash it with warm soapy water. A splash of vinegar helps kill lingering bacteria and freshen things up. Dry the pan thoroughly before sliding it back into place. This often-forgotten step keeps your whole drainage system healthy and smell-free.
Step 7: Reassemble, Test, and Maintain
With the line clear and the pan clean, put everything back together. Reinstall the shelves, drawers, and rear freezer panel, then plug the fridge back into the outlet. Mastering how to unclog refrigerator drain buildup also means testing your work, so pour a little water into the drain and watch it flow smoothly to the pan below.
Return your food to the shelves once the interior cools down. Going forward, flush the drain with warm water every few months to prevent future clogs. Regular attention keeps the system flowing and spares you from repeating the deeper cleaning too often. Consistency is the real secret here.
Frequently Asked Questions
How Often Should I Clean My Refrigerator Drain?
For most households, cleaning the drain every three to six months keeps things running smoothly. If you notice water pooling, odd smells, or ice forming near the back wall, tackle it right away rather than waiting. Homes with heavy fridge use or older appliances may benefit from more frequent checks. Building this into your seasonal cleaning routine makes it easy to remember and prevents small clogs from becoming big headaches.
What Causes a Refrigerator Drain to Clog?

Clogs usually form from a mix of food particles, dust, and organic debris that wash into the drain over time. This buildup creates a sticky sludge that traps more grime and eventually blocks the flow. In freezers, water sometimes freezes inside the line before it can drain, forming an icy plug. Regular flushing and keeping the interior clean go a long way toward stopping these blockages before they start.
Can I Use Chemicals to Clear the Drain?
It’s best to skip harsh chemical drain cleaners inside your refrigerator. They can damage the plastic lines and leave residue near your food, which nobody wants. A gentle mixture of warm water and baking soda works remarkably well for most clogs and is completely food-safe. For tougher blockages, a flexible cleaning tool paired with warm water does the job without any risk to your appliance or your health.
Why Is There Still Water After I Clear the Drain?
If water remains after cleaning, the clog may not be fully cleared, or the drain pan underneath could be overflowing. Double-check that your flushing solution flows freely all the way to the pan. Sometimes a small piece of debris shifts and re-blocks the line, so a second flush helps. Also confirm the fridge sits level, since an uneven appliance can cause water to collect in the wrong spot.
Do I Need a Professional for This Job?
In most cases, no. This is a beginner-friendly task that anyone can handle with basic household items and a little patience. Following each step carefully gives you great results without a service fee. That said, if you’ve cleared the drain, cleaned the pan, and still see leaks or persistent water, there may be a deeper mechanical issue. At that point, calling a qualified appliance technician is the smart move.
Conclusion
Keeping your fridge dry, fresh, and efficient really does come down to a handful of simple habits, and knowing how to unclog refrigerator drain buildup puts you firmly in control. You’ve learned how to spot the warning signs, prep your appliance safely, thaw any ice, flush the line, clear stubborn blockages, and clean the drain pan for good measure. Each step builds on the last to restore proper drainage and protect your food from odors and spoilage.
The best part is that this is a skill you can repeat with confidence whenever you need it. Set a reminder to flush the drain every few months, and you’ll rarely deal with a serious clog again. Don’t wait for a puddle to appear before you act. Grab your flashlight and a turkey baster, put these steps to work today, and enjoy a cleaner, healthier, longer-lasting refrigerator.

About
Ethan Wrenford is a dedicated home appliance specialist with years of hands-on experience in appliance troubleshooting, maintenance, repair, and DIY diagnostics. His professional focus lies in combining practical repair knowledge with simple, easy-to-follow solutions, helping homeowners understand common appliance problems and confidently identify potential causes at home. As an author at ApplianceWhy, Ethan shares practical knowledge on home appliance repair, DIY appliance diagnostics, maintenance, troubleshooting, appliance care, and everyday solutions for common household appliance issues.
Education
Portland Community College (Portland, USA)
Associate Degree in Appliance Technology & Residential Systems
- Focused on residential appliance systems, electrical fundamentals, mechanical components, and appliance troubleshooting.
- Developed practical skills in appliance diagnostics, component testing, electrical safety, and repair procedures.
- Gained hands-on experience working with refrigerators, washing machines, dryers, dishwashers, ovens, ranges, and other household appliances.
Oregon Institute of Technology (Klamath Falls, USA)
Bachelor’s in Applied Electronics & Technology
- Specialized in electrical systems, electronic controls, sensors, motors, and residential equipment.
- Studied diagnostic techniques for identifying electrical, mechanical, and component-related appliance problems.
- Completed practical projects involving appliance control systems, troubleshooting methods, preventive maintenance, and repair fundamentals.
Publications and Impact
Through ApplianceWhy, Ethan shares practical insights into home appliance repair, DIY diagnostics, maintenance, troubleshooting, and appliance care. His writing focuses on turning confusing appliance problems into simple, understandable steps that homeowners can follow safely.
Ethan covers everything from diagnosing a refrigerator that is not cooling and a washing machine that will not drain to troubleshooting dryers, dishwashers, ovens, microwaves, and other common household appliances. His content helps readers understand appliance symptoms, identify possible causes, perform basic diagnostic checks, and determine when professional repair may be necessary.
Through his work, Ethan aims to bridge the gap between professional appliance repair knowledge and everyday homeowners—making appliance troubleshooting more approachable, practical, and accessible to everyone who wants to diagnose smarter, maintain better, and keep their appliances running longer.