

A clogged dryer lint chute rarely announces itself. It sits behind the machine, out of sight, doing quiet damage while your laundry piles up and your dryer strains through cycle after cycle. Lint keeps collecting.
Your clothes stay damp longer than they should. And the energy bill? It edges up a little each month, without any obvious explanation.
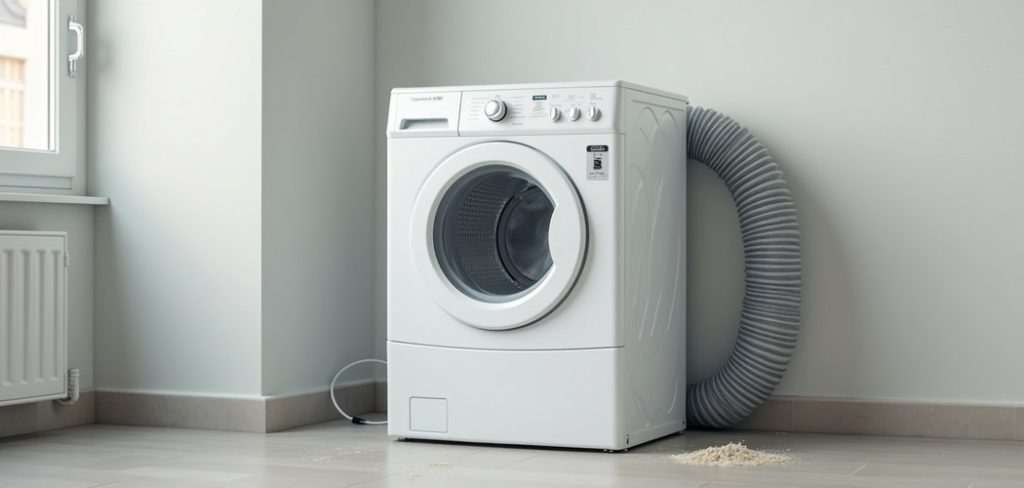
Here’s the part that should give you pause. Trapped lint burns easily, and the U.S. Fire Administration has linked thousands of home fires each year to dryers that nobody bothered to maintain. So this isn’t just about efficiency. It’s about a small risk that quietly compounds.
The reassuring news is that you can fix this yourself, probably in less than an hour. There’s no need to call anyone or buy specialized gear beyond a basic brush kit.
A bit of patience goes a long way. What follows is a walk-through of the whole thing—what the chute actually is, how to tell when it needs attention, and seven steps to get it clean.
In this guide on how to clean dryer lint chute, we will discuss the importance of cleaning dryer lint chutes and provide a step-by-step guide on how to properly clean them.
What Is a Dryer Lint Chute?
The lint chute is the ductwork that pulls hot, damp air and stray fibers away from your dryer and pushes them outside. One end connects to the back of the machine.
The other opens through an exterior wall or, in some homes, the roof. Every load sends a little burst of fabric fibers through this passage.Your lint trap catches the bulk of it. But not all.
A portion slips past and settles along the inner walls of the chute, where it clings and gathers, layer by layer, over months and years. You’d never notice from the outside.
That’s the trouble with it. An overlooked chute chokes airflow, which forces the dryer to overheat and run longer than it should. The machine wears out faster. The fire risk climbs.
All of it happens in a spot you almost never look.

Signs Your Dryer Lint Chute Needs Cleaning
Most dryers give you a warning before things get serious. The signals are easy to miss if you’re not paying attention, so here’s what tends to show up first:
- Clothes take longer to dry. When one cycle no longer finishes the job, restricted airflow is usually the culprit.
- The dryer feels hot to the touch. Heat radiating off the outside of the machine may suggest air and lint are trapped inside.
- A burning or musty smell. An odd odor during a cycle is the kind of warning you should never wave off.
- The room gets humid. Moist air that can’t escape properly ends up lingering around your laundry area.
- Lint gathers near the vent. Fibers collecting around the outdoor vent opening often point to a buildup further inside.Notice one or more of these? Time to clean the chute. Even if none of them appear, though, once a year is a sensible minimum. Some households need it more often, which we’ll get to.
Tools and Materials Needed
Gather everything before you start. Hunting for a screwdriver halfway through, with the dryer already pulled from the wall, tends to sour the whole afternoon.
Dryer Vent Cleaning Brush Kit
This is the tool that matters most. The extendable rods let you push deep into the chute and scrub loose the lint that clings to the walls.
Vacuum Cleaner With Hose Attachment
Once you’ve knocked the lint free, a vacuum pulls it out. A narrow hose attachment reaches the tight corners a wide nozzle can’t.
Screwdriver
You’ll almost certainly need one to release the clamps holding the vent hose.
Microfiber Cloths
Handy for wiping down surfaces and mopping up the mess that inevitably appears.

Work Gloves and a Dust Mask
Gloves spare your hands. The mask keeps fine lint out of your lungs, which you’ll appreciate the moment the dust starts flying.
Safety Precautions Before Cleaning
Start by unplugging the dryer. This isn’t optional. If yours runs on gas, shut off the supply valve too, since a disturbed connection can leak. Cleaning a machine that’s still powered or connected is asking for trouble.
Give yourself space. Slide the dryer away from the wall slowly, and if it’s heavy, get someone to help rather than wrenching your back over a chore. Keep the gloves and mask on the whole time. Lint that’s been sitting in a chute for months tends to irritate skin and airways once it’s stirred up.
7 Simple Steps on How to Clean Dryer Lint Chute
Step 1: Disconnect the Dryer
Pull the plug from the outlet. Gas models need the valve shut off. Then ease the dryer away from the wall until you can reach the vent hose behind it. No rushing here—cords and hoses snag if you yank.
Step 2: Detach the Vent Hose
Loosen the clamp that joins the hose to the dryer with your screwdriver, then work the hose free. You’ll likely spot a wad of lint sitting right at the opening. Oddly satisfying, and a sign you caught the problem before it got worse.
Step 3: Clean the Vent Hose
Pull out the visible lint by hand, then vacuum the rest. If the hose is the flexible type, bend it gently to shake packed lint loose before you suck it out. While you’re there, look the hose over. A crack or a crushed section means it’s time for a replacement.
Step 4: Brush Out the Chute
Feed the flexible brush into the chute opening. Push and twist together, adding rods as you go to reach the far end. That twisting motion is what scrapes the lint off the walls. Take it slow. Force the brush, and you risk denting the duct, which only creates new spots for lint to catch.

Step 5: Vacuum the Loosened Lint
With the walls brushed clean, the vacuum finishes the job. Run the hose attachment through the chute to collect everything you dislodged. Work it from both ends—the interior side and the exterior vent—so nothing gets left behind in the middle.
Step 6: Clean the Exterior Vent
Now head outside. Take off the vent cover and clear out whatever’s collected there: lint, leaves, the occasional bird’s nest. Check that the flap swings open and shut freely. A flap stuck shut traps air and moisture right back inside, undoing your work indoors.
Step 7: Reassemble and Test
Reconnect the hose, tighten the clamp, and push the dryer back into place. Plug it in, or turn the gas back on, then run a short cycle. Step outside and feel for strong airflow at the vent. That steady push of air is how you know the job’s done.
Everything ready? Good. Here are the seven steps on how to clean dryer lint chute, start to finish.
Common Mistakes to Avoid
The most frequent slip-up is cleaning the lint trap and calling it finished. The trap only catches surface fibers. Plenty still works its way into the ductwork, so skipping the chute leaves the real hazard sitting there untouched.Then there’s the tool problem.
People reach for a coat hanger when they can’t find a proper brush, and a bent wire tends to puncture or dent the duct—which, again, gives lint fresh places to snag. Not worth it.Speed is the other enemy.
Rush the reconnection, and you leave the hose loose, which lets warm, linty air leak straight into your home. And a fair number of people simply forget the exterior vent.
A blocked outdoor opening cancels out everything you did inside, so finishing the job outdoors isn’t optional.
How to Prevent Lint Buildup
Good habits stretch the time between deep cleans. The single most useful one is emptying the lint trap after every load. It’s a ten-second job that stops most fibers before they ever reach the chute.Don’t cram the drum, either. Overloaded cycles choke airflow and drive more lint into the ductwork than a normal load would.
Every few months, glance at the vent hose for kinks or sagging spots where lint likes to settle.
And if you use heavy dryer sheets, consider swapping them for dryer balls—sheet residue can film over the lint trap and dull its efficiency over time.
Small adjustments, but together they keep the machine safer and the chute cleaner for longer.

Frequently Asked Questions
How Often Should I Clean My Dryer Lint Chute?
Once a year is the baseline. If you run laundry constantly, live in a full household, or share your home with a shedding pet, aim for every six months instead. And whenever the warning signs appear—longer drying times being the clearest—move it up regardless of the calendar.
Can I Clean the Dryer Lint Chute Myself?
For most people, yes. A brush kit, a vacuum, and under an hour will handle it. The exception is a chute that’s unusually long, routes up through the roof, or twists through several bends. In those cases, a professional is the safer bet, since awkward runs are hard to clean thoroughly and easy to damage.
What Happens if I Never Clean the Lint Chute?
Nothing good. Clothes dry slower, bills creep upward, and the dryer’s lifespan shortens as it works harder than it should. The serious concern, though, is fire. Packed lint is highly flammable, and a neglected chute is exactly the kind of hidden hazard that turns a routine load into an emergency.
Conclusion
For an hour of effort, the return here is hard to argue with. You get a dryer that performs better, a lower energy bill, and one genuine fire risk removed from your home.
The seven steps on how to clean dryer lint chute above are manageable even if you’ve never opened up the back of your machine before.The trick is making it routine rather than a one-off.
Pair a yearly chute cleaning with the daily habit of emptying the lint trap, and the whole system stays in good shape. Faster drying, a longer-lasting machine, and a bit of peace of mind.
Pull out the brush kit this weekend and set aside the hour—it’s a small investment that pays back quietly for years.

About
Ethan Wrenford is a dedicated home appliance specialist with years of hands-on experience in appliance troubleshooting, maintenance, repair, and DIY diagnostics. His professional focus lies in combining practical repair knowledge with simple, easy-to-follow solutions, helping homeowners understand common appliance problems and confidently identify potential causes at home. As an author at ApplianceWhy, Ethan shares practical knowledge on home appliance repair, DIY appliance diagnostics, maintenance, troubleshooting, appliance care, and everyday solutions for common household appliance issues.
Education
Portland Community College (Portland, USA)
Associate Degree in Appliance Technology & Residential Systems
- Focused on residential appliance systems, electrical fundamentals, mechanical components, and appliance troubleshooting.
- Developed practical skills in appliance diagnostics, component testing, electrical safety, and repair procedures.
- Gained hands-on experience working with refrigerators, washing machines, dryers, dishwashers, ovens, ranges, and other household appliances.
Oregon Institute of Technology (Klamath Falls, USA)
Bachelor’s in Applied Electronics & Technology
- Specialized in electrical systems, electronic controls, sensors, motors, and residential equipment.
- Studied diagnostic techniques for identifying electrical, mechanical, and component-related appliance problems.
- Completed practical projects involving appliance control systems, troubleshooting methods, preventive maintenance, and repair fundamentals.
Publications and Impact
Through ApplianceWhy, Ethan shares practical insights into home appliance repair, DIY diagnostics, maintenance, troubleshooting, and appliance care. His writing focuses on turning confusing appliance problems into simple, understandable steps that homeowners can follow safely.
Ethan covers everything from diagnosing a refrigerator that is not cooling and a washing machine that will not drain to troubleshooting dryers, dishwashers, ovens, microwaves, and other common household appliances. His content helps readers understand appliance symptoms, identify possible causes, perform basic diagnostic checks, and determine when professional repair may be necessary.
Through his work, Ethan aims to bridge the gap between professional appliance repair knowledge and everyday homeowners—making appliance troubleshooting more approachable, practical, and accessible to everyone who wants to diagnose smarter, maintain better, and keep their appliances running longer.