

Most people wipe down shelves and toss out expired leftovers, but the back of the fridge rarely gets a second glance. That’s a mistake.
Behind your refrigerator sits a network of coils, fans, and vents that work hard to keep your food cold. Over time, dust, pet hair, cobwebs, and grime build up on these parts.
When that happens, your fridge works harder, uses more energy, and may even break down sooner than it should.
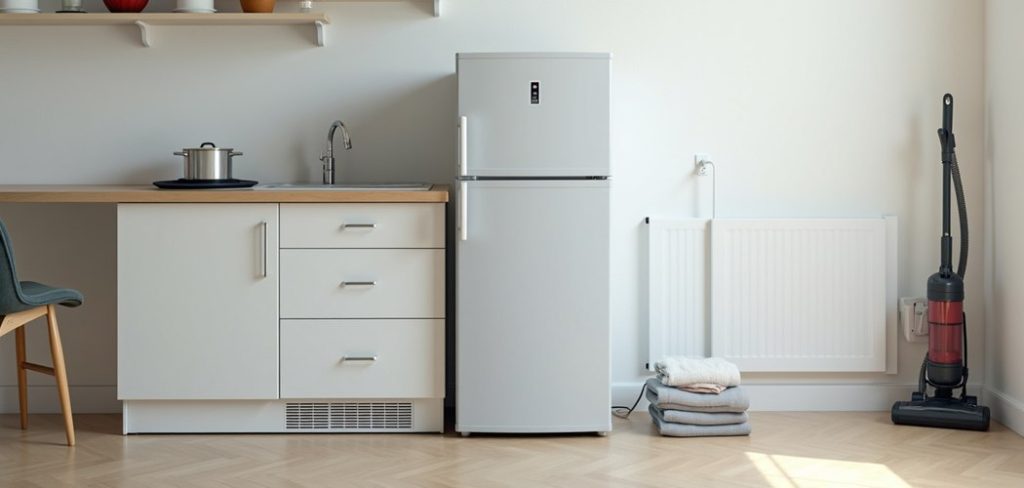
Cleaning the back of your fridge isn’t complicated, but it does take a little care. You’ll be dealing with electrical parts, tight spaces, and heavy equipment. The good news? With the right tools and a bit of patience, you can handle this task in under an hour.
This guide on how to clean back of fridge walks you through everything, from the benefits to the exact steps, plus the mistakes to steer clear of. Let’s get your fridge running smoothly again.
What are the Benefits?
Cleaning the back of your fridge does more than make it look tidy. Here are the key reasons it’s worth your time:
A few minutes of effort delivers real savings and peace of mind.

- Lower energy bills. Dusty condenser coils force your fridge to work overtime. Clean coils help it run efficiently, which can trim your electricity costs.
- Longer appliance life. When your fridge doesn’t have to strain, its parts last longer. A little cleaning now can save you from an expensive replacement later.
- Better cooling performance. Clean coils release heat properly, so your fridge keeps food at the right temperature. That means fresher food and fewer spoiled groceries.
- Fewer breakdowns. Overheating is a common cause of fridge failure. Removing dust helps prevent your compressor from overworking and giving out.
- Improved air quality. Dust and pet hair behind the fridge can spread through your kitchen. Clearing it out keeps your space cleaner and healthier.
- Fewer pests. Crumbs and grime attract bugs and rodents. A clean back panel gives them one less reason to move in.
What Will You Need?
Before you start, gather your supplies. Having everything ready makes the job faster and safer. Here’s your checklist:
Most of these items are things you already own. If you don’t have a coil brush, you can buy one cheaply at a hardware store. It makes a big difference for reaching tight spots.
- Vacuum cleaner with a hose and brush attachment
- Coil cleaning brush or a long, soft-bristled brush
- Microfiber cloths for wiping surfaces
- Warm water and mild dish soap
- Spray bottle for cleaning solution
- Rubber gloves to protect your hands
- Dust mask if you’re sensitive to dust
- Flashlight to see into dark, tight spaces
- A helper to move the fridge (optional but useful)
- Furniture sliders to make moving easier
- Bucket for dirty water
10 Easy Steps on How to Clean Back of Fridge
Step 1: Unplug the Fridge
Safety comes first. Before you touch anything behind your fridge, pull the plug from the wall outlet. You’ll be working near electrical parts and possibly using water nearby, so cutting the power is non-negotiable.
Locate the cord and gently unplug it. If your fridge is hard to reach, you may need to move it slightly first, but always aim to disconnect the power as early as you can.
Never skip this step, even if you’re only planning a quick dusting. Working on a live appliance puts you at risk of electric shock.
Step 2: Empty and Prepare the Area
If you plan to move the fridge, it helps to lighten the load. Consider removing heavy items from inside, especially if you’ll be tilting or shifting the unit. Clear the floor around the fridge so you have room to work.
Move nearby chairs, rugs, or trash cans out of the way. Lay down a towel or old sheet to catch any dust or drips.
Taking a few minutes to prep your workspace saves you frustration later and keeps your kitchen clean during the process.
Step 3: Pull the Fridge Away from the Wall
Gently slide the fridge forward to expose the back. This can be tricky since fridges are heavy and often have wheels or feet that stick. Ask a helper to assist, or use furniture sliders under the base to reduce strain.
Move slowly and watch the power cord, water line, and any hoses so you don’t yank them loose. Pull the fridge out just far enough to reach the back comfortably, usually a foot or two.
Be careful of your flooring, as dragging can scratch tile or wood.

Step 4: Locate the Condenser Coils
Once you can see the back, find the condenser coils. These are the black, grille-like metal tubes that release heat from your fridge. On some models, they sit on the back panel.
On others, they’re hidden underneath, behind a bottom kickplate. Use your flashlight to spot them. If you’re unsure, check your fridge’s manual. Knowing where the coils are matters because they collect the most dust and need the most attention.
This is the heart of your cleaning job.
Step 5: Vacuum Loose Dust and Debris
Grab your vacuum with the brush attachment and start removing loose dust. Work gently over the coils, back panel, and any vents. You’ll likely see clumps of dust, pet hair, and cobwebs come away. Take your time and cover the whole area.
The vacuum lifts the surface layer so your deeper cleaning goes smoother. Don’t press too hard on the coils, as they can bend. A soft, steady touch does the trick.
Vacuum the floor beneath the fridge too, since dust collects there as well.
Step 6: Brush the Condenser Coils
After vacuuming, use your coil brush to loosen stubborn dust wedged between the coils. Slide the brush along and between the metal tubes with light pressure. This dislodges grime the vacuum missed.
As you brush, keep the vacuum handy to suck up the debris you knock loose. Alternate between brushing and vacuuming until the coils look clean.
Clean coils are the biggest factor in fridge efficiency, so give this step the attention it deserves. Be patient and thorough here.
Step 7: Clean the Fan and Vents
Many fridges have a condenser fan near the compressor at the bottom back. Dust builds up on the fan blades and around the motor. Gently vacuum and brush these areas, being careful not to bend the blades.
Wipe the vents with a dry cloth to clear any remaining buildup. A clean fan moves air properly, which helps your fridge stay cool. If the blades are stuck with grime, use a slightly damp cloth, then dry them right away.
Never spray water directly on electrical parts.

Step 8: Wipe Down the Back Panel
Now tackle the flat back surface and the compressor housing. Mix warm water with a few drops of mild dish soap in your spray bottle. Spray a microfiber cloth, not the fridge, and wipe away grease and grime.
Avoid soaking any electrical components. Wring the cloth well so it’s damp, not dripping. Work from top to bottom so drips fall onto areas you haven’t cleaned yet.
This step removes the sticky film that dust clings to, making future cleanings easier.
Step 9: Clean the Floor and Surrounding Walls
While the fridge is pulled out, take advantage of the open space. Vacuum and mop the floor where the fridge normally sits. You’ll probably find dust, crumbs, and maybe a lost utensil or two.
Wipe down the wall behind the fridge as well, since grime settles there over time. This is a spot you rarely reach, so make the most of it.
A clean floor and wall also help keep the back of your fridge cleaner for longer.
Step 10: Dry, Reposition, and Plug Back In
Before you push the fridge back, make sure everything is completely dry. Any leftover moisture near electrical parts is a hazard. Use a dry cloth to wipe down the coils, fan, and back panel one last time.
Then carefully slide the fridge back into place, minding the cord and water line. Leave a few inches of gap between the fridge and the wall so air can circulate.
Finally, plug the fridge back in and listen for the familiar hum. You’re done.
5 Things You Should Avoid
Even a simple task has pitfalls. Steer clear of these common mistakes:
Avoiding these errors keeps you safe and protects your appliance.

- Skipping the unplug step. Never clean around electrical parts while the fridge is powered. It’s dangerous and not worth the risk.
- Using harsh chemicals. Bleach and strong cleaners can damage coils and finishes. Stick to mild soap and water.
- Spraying water directly on electrical components. Always spray your cloth, never the fridge itself. Water and electronics don’t mix.
- Bending the coils or fan blades. These parts are delicate. Pressing too hard can cause damage that hurts performance.
- Pushing the fridge flush against the wall. Your fridge needs breathing room. Leave a gap so heat can escape and coils stay cooler.
Conclusion
How to clean back of fridge is one of those small chores that delivers big rewards. In under an hour, you can lower your energy bills, extend your appliance’s life, and keep your kitchen healthier.
The steps are simple: unplug, pull it out, vacuum and brush the coils, wipe things down, and put it all back together. With the right tools and a bit of care, anyone can do it.
Don’t wait for your fridge to struggle before you give it some attention. Make coil cleaning a regular part of your home routine, and your refrigerator will thank you with years of reliable service.
Grab your vacuum, roll up your sleeves, and give the back of your fridge the care it deserves. Your wallet and your food will be better for it.

About
Ethan Wrenford is a dedicated home appliance specialist with years of hands-on experience in appliance troubleshooting, maintenance, repair, and DIY diagnostics. His professional focus lies in combining practical repair knowledge with simple, easy-to-follow solutions, helping homeowners understand common appliance problems and confidently identify potential causes at home. As an author at ApplianceWhy, Ethan shares practical knowledge on home appliance repair, DIY appliance diagnostics, maintenance, troubleshooting, appliance care, and everyday solutions for common household appliance issues.
Education
Portland Community College (Portland, USA)
Associate Degree in Appliance Technology & Residential Systems
- Focused on residential appliance systems, electrical fundamentals, mechanical components, and appliance troubleshooting.
- Developed practical skills in appliance diagnostics, component testing, electrical safety, and repair procedures.
- Gained hands-on experience working with refrigerators, washing machines, dryers, dishwashers, ovens, ranges, and other household appliances.
Oregon Institute of Technology (Klamath Falls, USA)
Bachelor’s in Applied Electronics & Technology
- Specialized in electrical systems, electronic controls, sensors, motors, and residential equipment.
- Studied diagnostic techniques for identifying electrical, mechanical, and component-related appliance problems.
- Completed practical projects involving appliance control systems, troubleshooting methods, preventive maintenance, and repair fundamentals.
Publications and Impact
Through ApplianceWhy, Ethan shares practical insights into home appliance repair, DIY diagnostics, maintenance, troubleshooting, and appliance care. His writing focuses on turning confusing appliance problems into simple, understandable steps that homeowners can follow safely.
Ethan covers everything from diagnosing a refrigerator that is not cooling and a washing machine that will not drain to troubleshooting dryers, dishwashers, ovens, microwaves, and other common household appliances. His content helps readers understand appliance symptoms, identify possible causes, perform basic diagnostic checks, and determine when professional repair may be necessary.
Through his work, Ethan aims to bridge the gap between professional appliance repair knowledge and everyday homeowners—making appliance troubleshooting more approachable, practical, and accessible to everyone who wants to diagnose smarter, maintain better, and keep their appliances running longer.