

Your refrigerator works hard every single day to keep your food fresh and safe. But there’s one small part that quietly does a big job, and most people forget it even exists: the drain hole.
Tucked away at the back of your fridge’s interior, this tiny opening carries away the moisture and condensation that naturally build up inside.
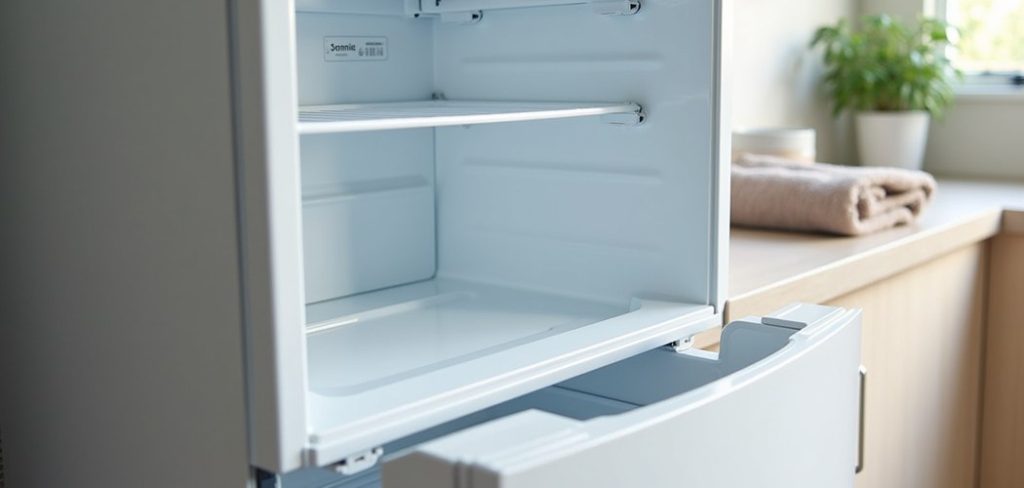
When that drain hole gets clogged, trouble starts. You might notice water pooling at the bottom of your fridge, strange smells creeping in, or even ice forming in odd places. Left alone, a blocked drain can lead to mold, damaged food, and a fridge that just doesn’t run the way it should.
In this guide on how to clean a fridge drain hole, we’ll walk you through everything you need to know, from why it matters to the exact steps you should follow. By the end, you’ll feel confident keeping your fridge clean, dry, and running smoothly for years to come.
Benefits of Cleaning a Fridge Drain Hole
Taking a few minutes to clean your fridge drain hole brings real, lasting rewards. Here’s what you gain when you keep this small part clear.

- No more water puddles. A clogged drain sends water where it shouldn’t go. Cleaning it out stops water from collecting at the bottom of your fridge, which keeps your produce drawers and shelves dry.
- Fresher smells. Standing water and trapped gunk create the perfect home for bacteria. That’s often the source of that musty odor you can’t quite place. A clean drain means fresher-smelling food storage.
- Prevents mold and mildew. Moisture plus warmth equals mold. When you keep the drain clear, you cut off the damp conditions mold needs to grow. This protects both your fridge and your health.
- Better cooling performance. When drains block up and water freezes, your fridge has to work harder. Clearing the drain helps your appliance run efficiently, which can lower your energy bills.
- Longer appliance life. Regular maintenance reduces strain on your fridge’s parts. A little care now can save you from costly repairs or an early replacement later.
- Peace of mind. Knowing your fridge is clean and working properly just feels good. You’ll worry less about leaks, smells, or spoiled food.
What Will You Need?
Before you start, gather your supplies. Most of these you probably already have at home. Having everything ready makes the job faster and smoother.
That’s it. No special tools, no harsh chemicals. Once you’ve got these on hand, you’re ready to begin.
- Warm water – for flushing and rinsing the drain
- Baking soda – a natural cleaner and deodorizer
- White vinegar – helps break down grime and buildup
- A small funnel or turkey baster – for pouring water into the drain
- Pipe cleaners or a soft, flexible wire – to gently clear clogs
- A cotton swab or small brush – for scrubbing the opening
- A clean cloth or sponge – for wiping surfaces
- A small bowl – to mix your cleaning solution
- Rubber gloves – to keep your hands clean and protected
- A towel – to catch any drips or spills
10 Easy Steps on How to Clean a Fridge Drain Hole
Step 1: Unplug Your Refrigerator
Safety always comes first. Before you touch anything inside, unplug your fridge from the wall outlet. This protects you from any electrical risk while you work near water. It also gives your appliance a short rest.
If the plug is hard to reach, you can switch off the power at the breaker instead. Take a moment to make sure the fridge is fully powered down before moving on.
This simple step keeps you safe and lets you clean without worry.
Step 2: Empty the Fridge Interior
Next, clear out the food from your refrigerator. Move everything to a cooler or a shaded countertop, especially items that spoil quickly like dairy and meat.
Emptying the fridge gives you full access to the interior and prevents anything from getting in your way. It also lets you spot expired items you can toss out. Work quickly so your food stays cold.
Once the shelves are clear, you’ll have plenty of room to find and clean the drain hole without knocking anything over.
Step 3: Locate the Drain Hole
Now it’s time to find the drain hole. In most refrigerators, it sits at the back of the interior, near the bottom, below the shelves. It usually looks like a small round opening or a shallow dip in the fridge floor.
Some models hide it beneath the produce drawers, so you may need to remove those first. If you’re unsure, check your fridge’s manual for the exact spot. Once you find it, take a close look.
You may already see some grime or water buildup around the edges.

Step 4: Remove Any Visible Debris
Before you pour anything in, clear away the gunk you can see. Use a cotton swab, a small brush, or your gloved fingers to wipe around the drain opening. Food crumbs, dust, and slimy residue often collect right at the entrance.
Gently loosen and remove this debris so it doesn’t get pushed deeper into the drain. Take your time here. Removing surface buildup first makes the deeper cleaning much more effective.
Wipe the surrounding area with a cloth to keep everything tidy as you go.
Step 5: Mix Your Cleaning Solution
In a small bowl, mix one tablespoon of baking soda with about two cups of warm water. Stir until the baking soda dissolves. This gentle solution cleans and deodorizes without harming your fridge.
If the drain is heavily clogged, you can add a splash of white vinegar for extra cleaning power. The mild fizzing helps break down stubborn grime. Avoid using harsh chemical cleaners, since these can damage the drain and leave odors behind.
Your homemade mix is safe, effective, and easy on your appliance.
Step 6: Flush the Drain With the Solution
Using your funnel or turkey baster, slowly pour the cleaning solution into the drain hole. Let it flow down and sit for a few minutes. This gives the baking soda and vinegar time to loosen any buildup inside the drain line.
You might hear soft trickling or fizzing, which means the solution is doing its job. Don’t rush this part. Letting the mixture soak makes the next steps easier.
If the water backs up and won’t drain, that’s a sign of a deeper clog you’ll clear in the next step.
Step 7: Clear the Clog With a Pipe Cleaner
If the drain is still blocked, grab a pipe cleaner or a soft, flexible wire. Gently push it into the drain hole and move it back and forth. This dislodges any trapped debris deep inside the line.
Be careful not to force it or use anything sharp, as that could damage the drain tube. Work slowly and patiently. As the clog breaks free, you’ll feel the wire move more easily.
Once it slides through without resistance, the blockage is gone and the drain is open again.

Step 8: Flush With Clean Warm Water
Now rinse the drain thoroughly. Pour clean, warm water through the hole using your funnel or baster. This washes away the cleaning solution along with any loosened grime. Watch to make sure the water flows freely and doesn’t back up.
You may need to flush a few times to clear everything out completely. This step confirms that your drain is truly open and working.
Fresh water also rinses away any lingering vinegar or baking soda, leaving the drain clean and ready to do its job.
Step 9: Check the Drain Pan
Follow the drain line to its end, which leads to a drain pan at the bottom or back of your fridge. This pan collects the water that flows out of the drain.
Over time, it can fill with dirty water, dust, and even mold. Carefully pull it out if your model allows, empty it, and wash it with warm soapy water. Wipe it dry before sliding it back in place.
A clean drain pan prevents odors and stops water from overflowing behind your fridge.
Step 10: Reassemble and Restart
You’re almost done. Wipe down the interior with a clean cloth to remove any leftover moisture or residue. Put the produce drawers and shelves back in place. Return your food to the fridge, keeping perishables in first.
Finally, plug the refrigerator back in or switch the breaker on. Give it a little time to cool back down to the right temperature before packing it fully. Stand back and enjoy your fresh, clean fridge.
You’ve just completed a maintenance task that many people never even think about.
5 Things You Should Avoid
Cleaning your fridge drain hole is easy, but a few mistakes can cause problems. Keep these tips in mind to protect your appliance.

- Don’t use harsh chemicals. Bleach or strong cleaners can damage the drain line and leave harmful residue near your food. Stick to baking soda, vinegar, and warm water.
- Don’t force sharp objects into the drain. Knives, screwdrivers, or stiff wires can crack or puncture the drain tube. Use only soft, flexible tools to clear clogs.
- Don’t skip unplugging the fridge. Working near water while the appliance is powered on is a real safety risk. Always cut the power first.
- Don’t ignore the drain pan. Cleaning the hole but leaving the pan dirty defeats the purpose. Dirty water in the pan still causes smells and mold.
- Don’t wait too long between cleanings. Letting buildup pile up for months makes the job harder and can lead to leaks. Regular quick cleanings save you effort.
Conclusion
How to clean a fridge drain hole may seem like a small chore, but it makes a big difference. A clear drain keeps water from pooling, stops bad smells, and prevents mold from taking hold. It also helps your refrigerator run more efficiently and last longer, saving you money on repairs and energy over time.
The best part is how simple the process really is. With a few household items and about twenty minutes, you can tackle this task yourself. Just remember to unplug the fridge, clear the debris, flush the drain, and check the pan.
Follow the ten steps in this guide, avoid the common mistakes, and your fridge will thank you.

About
Ethan Wrenford is a dedicated home appliance specialist with years of hands-on experience in appliance troubleshooting, maintenance, repair, and DIY diagnostics. His professional focus lies in combining practical repair knowledge with simple, easy-to-follow solutions, helping homeowners understand common appliance problems and confidently identify potential causes at home. As an author at ApplianceWhy, Ethan shares practical knowledge on home appliance repair, DIY appliance diagnostics, maintenance, troubleshooting, appliance care, and everyday solutions for common household appliance issues.
Education
Portland Community College (Portland, USA)
Associate Degree in Appliance Technology & Residential Systems
- Focused on residential appliance systems, electrical fundamentals, mechanical components, and appliance troubleshooting.
- Developed practical skills in appliance diagnostics, component testing, electrical safety, and repair procedures.
- Gained hands-on experience working with refrigerators, washing machines, dryers, dishwashers, ovens, ranges, and other household appliances.
Oregon Institute of Technology (Klamath Falls, USA)
Bachelor’s in Applied Electronics & Technology
- Specialized in electrical systems, electronic controls, sensors, motors, and residential equipment.
- Studied diagnostic techniques for identifying electrical, mechanical, and component-related appliance problems.
- Completed practical projects involving appliance control systems, troubleshooting methods, preventive maintenance, and repair fundamentals.
Publications and Impact
Through ApplianceWhy, Ethan shares practical insights into home appliance repair, DIY diagnostics, maintenance, troubleshooting, and appliance care. His writing focuses on turning confusing appliance problems into simple, understandable steps that homeowners can follow safely.
Ethan covers everything from diagnosing a refrigerator that is not cooling and a washing machine that will not drain to troubleshooting dryers, dishwashers, ovens, microwaves, and other common household appliances. His content helps readers understand appliance symptoms, identify possible causes, perform basic diagnostic checks, and determine when professional repair may be necessary.
Through his work, Ethan aims to bridge the gap between professional appliance repair knowledge and everyday homeowners—making appliance troubleshooting more approachable, practical, and accessible to everyone who wants to diagnose smarter, maintain better, and keep their appliances running longer.